Intro
Hype song aside, I wanted to take a moment to share the lessons I learned while making Mischief Maker. This was a case of me pushing myself out of my comfort zone and trying to build something new and different. This pretty much meant that I started the project with an idea in mind of what I wanted it to be, but was in a total fog about how it would actually work. I didn’t know if it would actually work!
In this article we will walk through the basic thought structure I followed as I started to reason about how to integrate Angular with a midi controller and how I solved the problem. I would classify the code as “exploratory”, but I believe it could be helpful nonetheless.
The code to Mischief Maker is in the link below. One thing to note, this was a full page Electron application with my slides and demos integrated together for performance reasons. We are going to cherry pick the important bits that deal with midi.
Mischief MakerHow do I connect to a midi controller?

Connecting to a controller is obviously the first place we needed to start. Interestingly enough, I had no idea how to do this when I started building this project. Fortunately for us, there is a Web Midi API specification that allows us to enumerate, select and interact with midi devices. To gain access to our midi devices, we use navigator.requestMIDIAccess() which will return a promise that contains an iterable of all our connected midi devices. Because I am a huge fan of observables, I use fromPromise to convert our response into an observable so that I can transform the response into just the device that I want. To make it easy to select the device I want, I use Array.from to convert the iterable into an array. I am then grabbing just the midi inputs in the next map operation.
Observable
  .fromPromise(navigator.requestMIDIAccess())
  .map((midi: any) => Array.from(midi.inputs)) // convert from iterable
  .map((devices: any) => devices.map(device => device[1])) // grab just the MIDIInput
  .subscribe((devices: any) => this.devices = devices)
;
We then assign the response to this.devices and then iterate over the collection and display them in our template.
How do I capture signal from a midi controller?

Now that we have our connected devices, how do we capture a signal from them? This was a bit of an interesting step for me because I wanted to do something that would preserve the observable stream. In order to do this, I needed to find a way to wrap the onmidimessage event in an observable stream so I could pass the event object along. I accomplished this by creating a midiMessageAsObservable method which created a new observable subject that I could pass input.onmidimessage events down the stream by calling source.next(note).
private initMidiStream() {
  const midiAccess$ = Observable.fromPromise(navigator.requestMIDIAccess());
  const inputStream$ = midiAccess$.map((midi: any) => midi.inputs.values().next().value); // grab the first controller

const messages$ = inputStream$
    .filter(input => input !== undefined)
    .flatMap(input => this.midiMessageAsObservable(input))
    .map((message: any) => ({
      status: message.data[0] & 0xf0,
      data: [
        message.data[1],
        message.data[2],
      ],
    }))
    .subscribe(message => {
      this.messages.unshift(message);
      this.cd.detectChanges();
    })
  ;
}

private midiMessageAsObservable(input) {
  const source = new Subject();
  input.onmidimessage = note => source.next(note);
  return source.asObservable();
}
We then return our subject as an observable that we insert back into our messages$ stream with flatMap. From there, we are just adding the raw note data into an array so that we can visualize it.
How do I convert midi data to notes?

So we have raw midi data but how do we convert that to something that represents an actual musical note? This part was pretty straight forward as I just had to create a map that would transform the key value to a musical note. There are a few things within the midi stream itself that were pretty constant in the context of my example such as a status of 144 being a key press event and so I hard coded it as such. You will probably need to adjust this depending on the device you are using.
const noteTransforms = {
  48: 'C2', 49: 'C#2', 50: 'D2', 51: 'D#2', 52: 'E2', 53: 'F2',
  54: 'F#2', 55: 'G2', 56: 'G#2', 57: 'A2', 58: 'A#2', 59: 'B2',
  60: 'C3', 61: 'C#3', 62: 'D3', 63: 'D#3', 64: 'E3', 65: 'F3',
  66: 'F#3', 67: 'G3', 68: 'G#3', 69: 'A3', 70: 'A#3', 71: 'B3'
};

const messages$ = inputStream$
  .filter(input => input !== undefined)
  .flatMap(input => this.midiMessageAsObservable(input))
  .map((message: any) => {
    const status = message.data[0] & 0xf0;
    return {
      status: status === 144 ? 'PRESSED' : 'RELEASED', // Good until its not ¯_(?)_/¯
      name: noteTransforms[message.data[1]],
      pressure: message.data[2]
    }})
;
What was interesting to me is that I realized that I could map these keys to anything. There is no reason that I could not map middle C on my keyboard to make an API call to turn on a light halfway across the country when the key is down and turn it off when the key is up. When you start thinking of midi controllers as not just musical instruments, but rather just a big switch that you can map the keys to whatever you want, that is when things start to get really interesting!
How do I play midi notes so that I can hear them?

We have gone from connecting to listening to converting, but it would be nice to get to actually playing notes. I tried my hand at a few approaches until I found the amazing Tone.js library that streamlined a ton of stuff for me. I highly recommend investing some time into reading through their documentation and playing with their samples because it is a really powerful library. In Tone.js, the basic element of playing music is the Synth which can be expanded upon with a few additional versions of it. Because I wanted to play more than one note at a time, I created a PolySynth instance and then configured it to have six channels and use the fatsawtooth oscillator. I also created two analysers that I added to the synth which we will discuss in a moment.
private initSynth() {
  this.fft = new Tone.Analyser('fft', 32);
  this.waveform = new Tone.Analyser('waveform', 1024);

return new Tone.PolySynth(6, Tone.Synth, {
      'oscillator': {
        'type': 'fatsawtooth',
        'count': 3,
        'spread': 30
      },
      'envelope': {
        'attack': 0.01,
        'decay': 0.1,
        'sustain': 0.5,
        'release': 0.4,
        'attackCurve': 'exponential'
      },
    })
    .fan(this.fft, this.waveform)
    .toMaster();
}
With our synth created, we can call this.synth.triggerAttack to play a note and this.synth.triggerRelease to end the note. We are also calculating velocity to tell the synth how hard the key was pressed.
private midiMessageReceived(message: any) {
  let cmd = message.status >> 4;
  let noteNumber = noteTransforms[message.data[0]];
  let velocity = 0;
  if (message.data.length > 1) {
    velocity = message.data[1] / 120; // needs to be between 0 and 1 and sometimes it is over 100 ¯_(?)_/¯
  }

// MIDI noteon with velocity=0 is the same as noteoff
  if (cmd === 8 || ((cmd === 9) && (velocity === 0))) { // noteoff
    this.noteOff(noteNumber);
  } else if (cmd === 9) { // note on
    this.noteOn(noteNumber, velocity);
  }
}

noteOn(note, velocity) {
  this.synth.triggerAttack(note, null, velocity);
}

noteOff(note) {
  this.synth.triggerRelease(note);
}
How do I record a midi track?
We can now play music from our controller, but how do we record it? For this challenge, I added Recorder.js to this mix. What was awesome about this is that I was able to initialize a Recorder instance by passing in my Tonejs synth instance. With an instance of Recorder.js in hand, I had some fairly intuitive methods at my disposal. To start recording, I called this.audioRecorder.record after clearing my previous recording with this.audioRecorder.clear. To stop recording, I called this.audioRecorder.stop and this.audioRecorder.getBuffers to handle the audio buffer I just created.
constructor(
  private cd: ChangeDetectorRef,
  private sanitizer: DomSanitizer
) {
  this.synth = this.initSynth();
  this.audioRecorder = new Recorder(this.synth);
}

toggleRecording() {
  if (this.isRecording) {
    // stop recording
    this.audioRecorder.stop();
    this.audioRecorder.getBuffers(this.processBuffers.bind(this));
    this.isRecording = false;
  } else {
    // start recording
    if (!this.audioRecorder) {
      return;
    }
    this.isRecording = true;
    this.audioRecorder.clear();
    this.audioRecorder.record();
  }
}
And to convert the buffers into a WAV file, I called this.audioRecorder.exportWAV which conveniently encoded the file for me.
onBuffersProcessed(buffers) {
  this.audioRecorder.exportWAV(this.onEncoded.bind(this));
}

onEncoded(blob) {
  this.addBlob(blob);

this.setupDownload(blob, <code>myRecording${this.recIndex}.wav</code>);
  this.recIndex++;
}

setupDownload(blob, filename) {
  let url = (window.URL).createObjectURL(blob);
  this.downloadLink = this.sanitizer.bypassSecurityTrustUrl(url);
  this.downloadFile = filename || 'output.wav';
}

addBlob(blob) {
  this.wavesurfer.loadBlob(blob);
}
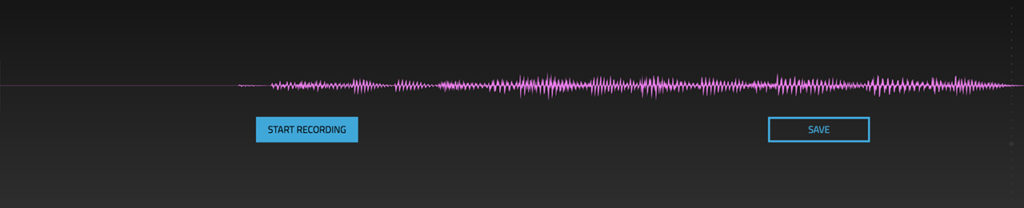
Once the file was encoded, I introduced one more player to the party by literally introducing a player. To display what we just recorded, I am passing our sound blob into a Waversurfer.js instance. I will talk about this more in the next section, but Wavesurfer.js gives us a really nice way to visualize and play an audio track.
How do I replay a midi track?

Perfect segue into the section about how to play a midi track! Because I know that we are eventually going to want to play multiple tracks, I created a TrackComponent that I could just pass in our audio data and it would render and play it. To initialize this.waveSurfer, I need to give a value to the container element that the track will be rendered in. There is a canvas element in the template called trackWave that I am referencing using @ViewChild.
export class TrackComponent implements OnInit, OnChanges {
  @ViewChild('trackWave') trackWave;
  @Input() blob;
  @Input() playing;
  waveSurfer = null;

ngOnInit() {
    this.waveSurfer = WaveSurfer.create({
      container: this.trackWave.nativeElement,
      scrollParent: true,
      waveColor: 'violet',
      progressColor: 'purple'
    });
    // Loop
    this.waveSurfer.on('finish', () => this.waveSurfer.playPause());
    // Load
    this.waveSurfer.loadBlob(this.blob);
  }

ngOnChanges(changes: SimpleChanges) {
    if (changes['playing']) {
      if (!this.waveSurfer) { return; }
      this.waveSurfer.playPause();
    }
  }
}
I also want our recorded track to loop, so I am adding a listener for the finish event that calls this.waveSurfer.playPause() to tell it to start playing again. You will also notice that I have an ngOnChanges event that is watching changes to the playing property and toggling whether our track is playing or not. I did this so that we could control the playback on multiple tracks at once from the parent component. The idea is that if we had more than one track, they would listen to the same playing property and start or stop playing as a group whenever it changed.
How do I layer a midi track?

This simplicity of this next example is why I love component driven architecture. By having a solid track component, all we need to do to create multiple tracks on our stage is to keep a collection of them and loop over them with ngFor.
<app-track *ngFor="let blob of blobs" [blob]="blob" [playing]="isPlaying"></app-track>
When we are done recording a track, we add the audio track to our collection. And because they are all bound to the same isPlaying property, we can play or stop them simultaneously.
addBlob(blob) {
  this.blobs = this.blobs.concat(blob);
}

togglePlaying() {
  this.isPlaying = !this.isPlaying;
}
If someone were to extend this further, the next thing to do would be to control the timing of the tracks so they the playback was synchronized with a locked timespan.
Resources
Shoutout
This entire project would have never happened without a huge push in the right direction from my buddy Ken Rimple. I was googling “How do I keep from destroying my career by learning Angular and midi in time for ng-conf!?!?!?!?!” and I ended up on a repository that was surprisingly helpful and lo and behold! It was Ken’s project! Fun fact… the very first conference I ever spoke at was Philly ETE which is organized by Chariot Solutions which Ken works for. I have since spoken at a bunch of conferences, but Ken was the one who helped me do a tech check the night before I was about to embark on something new and scary and totally awesome.
Here are two repositories of Ken’s that are especially interesting to this post.
Also, Ken does awesome training on the East Coast and so I highly recommend checking him out if you and your team are looking to level up.


