
The Website
Angular 2 has finally hit beta which was the mental milestone for me to start writing Angular 2 content. Hooray! To kick things off, I wanted to port a project that I covered in my Building a Website with AngularJS Pt 2 – Now With State! post to Angular 2. We are going to get acquainted with the brave new world of Angular 2 by building out a simple website so we can see how the Angular 2 pieces come together.
Grab the code from the repository below and let’s go!
CodeCompile and Serve
There are two main ways to compile and serve an Angular 2 application and that is via webpack or systemjs. I have personally fallen in love with webpack, and that is what we will use to build this app. I am not going to go too far into the details of the build system as there are a myriad of quality Angular 2 Webpack seed projects that will jumpstart your Angular 2 app. See the Resources section for more details.
You can write your Angular 2 application in ES5, EcmaScript 2015 or TypeScript, but the framework lends itself best to TypeScript. Writing in TypeScript requires a bit more setup but the return on investment is tenfold in terms of productivity and clarity in our code.
When you download the repository, the first thing you need to do is run npm i to install the package dependencies.
tsconfig.json
One of the package dependencies that we are going to install is typescript, which we will use to compile our TypeScript into the Type O negative version of JavaScript: the universal donor, ES5. We need to tell our compiler how we want to compile our TypeScript files, so we need to create a tsconfig.json file. The file below reads pretty well, but I will call out the two most important properties and those are “target”: “ES5” and “module”: “commonjs”. We are setting our ECMAScript version to ES5 and indicating that we want to generate our modules in the commonjs format.
{
  "compilerOptions": {
    "target": "es5",
    "module": "commonjs",
    "emitDecoratorMetadata": true,
    "experimentalDecorators": true,
    "sourceMap": true,
    "suppressImplicitAnyIndexErrors":true
  },
  "compileOnSave": false,
  "buildOnSave": false,
  "exclude": [
    "node_modules"
  ],
  "filesGlob": [
    "app/**/*.ts",
    "typings/browser.d.ts"
  ],
  "atom": {
    "rewriteTsconfig": false
  }
}
packages.json
We have defined how we want our TypeScript to be compiled, now we need to create a hook for the work to be done. In our packages.json file, we have defined a task that uses webpack-dev-server along with webpack to bundle our TypeScript modules and other assets into a single javascript file and then serve the app.
"scripts": {
  "start": "webpack-dev-server --inline --colors --watch --display-error-details --display-cached  --port 3001 --hot"
}
We then call npm start when we are ready to compile and serve our application.
Bootstrapping
The first mystery of Angular 2 for me was “How in the world do I even run the app!?”. The second mystery was “Okay, so how do I bootstrap the application?!”.
The first thing we need to do to bootstrap our application is to include the necessary resources into our index.html file. Because webpack is bundling everything into a single file, we only need to include one bundle.js file.
<script src="bundle.js"></script>
Inside the boot.ts file, we are importing three components; bootstrap, ROUTER_PROVIDERS and AppComponent. We are also importing core-js which is an ES6 polyfill, as well as zone.js which Angular uses for change detection. We then instantiate our application and specify our root level component, AppComponent and inject ROUTER_PROVIDERS as a submodule.
import 'core-js';
import 'zone.js/dist/zone';

import {bootstrap} from '@angular/platform-browser-dynamic';
import {ROUTER_PROVIDERS} from '@angular/router';
import {AppComponent} from './app.component';

bootstrap(AppComponent, [
  ROUTER_PROVIDERS
]);
Back in our index.html file, our entry point in the markup happens at this line: <app>Loading…</app>. Angular has instantiated AppComponent and loaded its template into the app element.
<body>
    <app>Loading...</app>
</body>
We have just covered how to compile, serve and bootstrap an Angular 2 application. Let us unpack what a component consists of so that we can make the connection between how AppComponent becomes app on our page.
The App Component
Angular components are really just JavaScript classes wrapped with love in Angular 2 metadata.
If you haven’t read my CIDER: My Checklist for Creating Angular 2 Components post, check it out. You will see the CIDER process in effect here.
The first thing I do when creating a component is to create the class. I will usually just stub it out because I will enhance it later.
export class AppComponent {}
The next thing we are going to do is to import our dependencies. In this case, we just need to import Component from @angular/core.
import {Component} from '@angular/core';
And from here, we are going to decorate our class by adding @Component metadata to tell our application how we want the AppComponent to behave. We are defining the HTML element we want this class to target in the selector property as well as setting our template and styles via templateUrl and styleUrls, respectively. We are also injecting ROUTER_DIRECTIVES into our component at the directives property.
@Component({
  selector: 'app',
  templateUrl: require('app/app.component.html'),
  styleUrls: [require('app/app.component.css')],
  directives: [ROUTER_DIRECTIVES]
})
export class AppComponent {}
This is where things get a bit fluid in the CIDER process. I will often spend n iterations enhancing my components and this could go on indefinitely. In our case, we want to add in routing to our application and so we are going to import the appropriate modules and decorate our component with @Routes. To enable routing, we are going to import Routes and ROUTER_DIRECTIVES as well as AboutComponent, ExperimentsComponent and HomeComponent.
import {Routes, ROUTER_DIRECTIVES} from '@angular/router';
import {AboutComponent} from './about/about.component';
import {ExperimentsComponent} from './experiments/experiments.component';
import {HomeComponent} from './home/home.component';
We need the routing modules to enable routing and the additional components for our routing table. We are passing in an array of route definitions into @Routes, which tell us the path of the route and what component is going to be mapped to that route. We want our home route to be our default route; to accomplish this, we do two things. First, we add a ‘/’ route to handle navigations to the top-level domain and reroute them to the home component. Then we will add in a ‘/*’ route to catch all other routes and reroute them to the home component. We will circle back around and talk about how the templates deal with routes in a moment but the basic gist of the new component router in Angular 2 is that each route maps to a component. Not really sure why they called it ComponentRouter though… JK!
@Routes([
  {path: '/',            component: HomeComponent },
  {path: '/home',        component: HomeComponent},
  {path: '/about',       component: AboutComponent },
  {path: '/experiments', component: ExperimentsComponent },
  {path: '/*',           component: HomeComponent }
])
We are also going to import StateService and ExperimentsService into our component and then decorate our component on the providers property which we will cover later. And I now present the #drumRoll AppComponent in its entirety!
import {Component} from '@angular/core';
import {Routes, ROUTER_DIRECTIVES} from '@angular/router';
import {AboutComponent} from './about/about.component';
import {ExperimentsComponent} from './experiments/experiments.component';
import {HomeComponent} from './home/home.component';
import {StateService} from './common/state.service';
import {ExperimentsService} from './common/experiments.service';

@Component({
  selector: 'app',
  templateUrl: require('app/app.component.html'),
  styleUrls: [require('app/app.component.css')],
  directives: [ROUTER_DIRECTIVES],
  providers: [StateService, ExperimentsService],
})
@Routes([
  {path: '/',            component: HomeComponent },
  {path: '/home',        component: HomeComponent},
  {path: '/about',       component: AboutComponent },
  {path: '/experiments', component: ExperimentsComponent },
  {path: '/*',           component: HomeComponent }
])
export class AppComponent {}
I really dig how everything up to this point has been self-documenting in its intentions and purpose. There isn’t a single piece in this component that I cannot immediately figure out what its purpose is.
To complete the CIDER process, we are going to repeat the process on a sub-component. All three of our components defined in our router are pretty much the same and so we are going to focus on the HomeComponent. There is some additional functionality in the ExperimentComponent that we will cover in a later post.
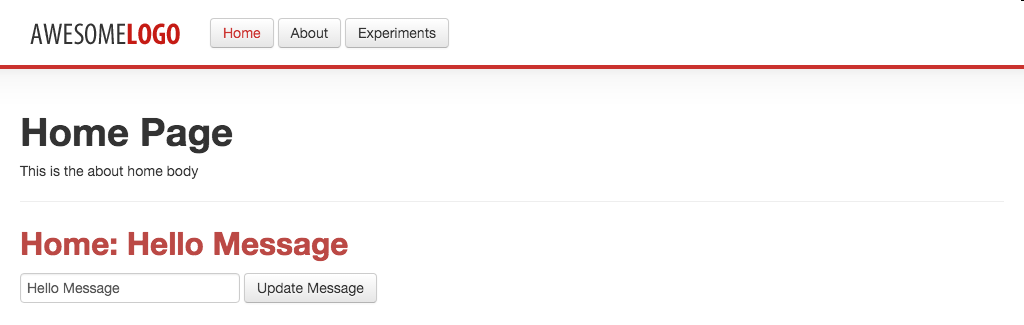
The Home Component
We are going to break ground on our HomeComponent by defining the HomeComponent class. We are also defining and initializing two properties on our class for the component’s title and body. This is a website after all!
export class HomeComponent {
  title: string = 'Home Page';
  body:  string = 'This is the about home body';
}
We will import the appropriate dependencies.
import {Component} from '@angular/core';
We will then decorate our class and set the selector and templateUrl properties.
@Component({
    selector: 'home',
    templateUrl: require('app/home/home.component.html')
})
We are going to use the StateService to store state between our routes and so we will add that to our component. Dependency injection within Angular 2 happens at the constructor and so we are going to add one to our class and inject the StateService. Components also have lifecycle hooks that we can use to sequence units of work. In our case, we want to retrieve and set our message from StateService when our component is initialized. We will use the ngOnInit hook to make that call for us. We don’t have to import OnInit and extend the class, but it is a good idea semantically.
import {Component, OnInit} from '@angular/core';
import {StateService} from '../common/state.service';

export class HomeComponent implements OnInit {
  title: string = 'Home Page';
  body:  string = 'This is the about home body';
  message: string;

constructor(private stateService: StateService) { }

ngOnInit() {
    this.message = this.stateService.getMessage();
  }

updateMessage(m: string): void {
    this.stateService.setMessage(m);
  }
}
Again, incredibly self-documenting and easy to read.
The State Service
We are going to create the StateService class and then expose it as a provider to our application. I am not going to offer too much commentary on the code below because it is so rudimentary in nature. It is essentially a service that has a getter and a setter for a message property.
export class StateService {
  private message = 'Hello Message';

getMessage(): string {
    return this.message;
  };

setMessage(newMessage: string): void {
    this.message = newMessage;
  };
}
Things get interesting when we want to make StateService available for injection into other components. The first step is to import Injectable into our class.
import {Injectable} from '@angular/core';
And then we decorate it with @Injectable().
@Injectable()
export class StateService {
  private message = 'Hello Message';

getMessage(): string {
    return this.message;
  };

setMessage(newMessage: string): void {
    this.message = newMessage;
  };
}
We have spent most of our time working through building our components, so let us complete the loop by locking down our templates.
The Views
Using home.component.html as our reference point, let us take an abbreviated tour of the updated template syntax in Angular 2.
One-way data binding is defined exactly like it was in Angular 1.x through string interpolation.
<h1>{{title}}</h1>
{{body}}
User input events are no longer captured by adding custom Angular directives to our markup but rather through capturing native DOM events and wrapping them in parenthesis. We can see this in the code below as we capture the click event with (click)=”updateMessage(message)” and call updateMessage.
<button type="submit" class="btn" (click)="updateMessage(message)">Update Message</button>
Two-way data binding in Angular 2 is basically one-way data binding applied twice. We talked about binding using string interpolation but we can also bind to properties using brackets syntax. We combine property binding (component to view) and event binding (view to component) to accomplish two-way data binding. The solution is surprisingly simple as we wrap our ngModel in both brackets and parenthesis to make [(ngModel)]=”message”.
<input type="text" [(ngModel)]="message" placeholder="Message">
For context, here is the entire home template.
<h1>{{title}}</h1>
{{body}}

<hr>
<div>
<h2 class="text-error">Home: {{message}}</h2>
<form class="form-inline">
      <input type="text" [(ngModel)]="message" placeholder="Message">
      <button type="submit" class="btn" (click)="updateMessage(message)">Update Message</button>
    </form>
</div>
Routing Markup
We are back to where we started as we wrap up this lesson with a discussion on the template syntax for routing in app.component.html. When we define a route, where does the component’s template actually get inserted? We set that insert point with router-outlet. It is the new ngView.
<div id="container">
    <router-outlet></router-outlet>
</div>
Great! So how do we navigate from one route to another? We do that with routerLink in the form of [routerLink]=”[‘/home’]” as we can see in the code below.
<h1 id="logo">
  <a [routerLink]="['/home']"></a>
</h1>
<div id="menu">
  <a [routerLink]="['/home']" class="btn">Home</a>
  <a [routerLink]="['/about']" class="btn">About</a>
  <a [routerLink]="['/experiments']" class="btn">Experiments</a>
</div>
And the entire app.component.html.
<header id="header">
<h1 id="logo">
    <a [routerLink]="['/home']"></a>
  </h1>
<div id="menu">
    <a [routerLink]="['/home']" class="btn">Home</a>
    <a [routerLink]="['/about']" class="btn">About</a>
    <a [routerLink]="['/experiments']" class="btn">Experiments</a>
  </div>
<div class="color"></div>
<div class="clear"></div>
</header>
<div class="shadow"></div>
<div id="container">
  <router-outlet></router-outlet>
</div>
Review
Before you raise your billable rates by 15% and start selling this sweet Angular 2 website, let us do a quick review of what we covered.
- We define how we want to compile TypeScript in our tsconfig.json file.
- We use webpack-dev-server to compile and serve our application.
- We saw how to use CIDER to build out our AppComponent and HomeComponent
- We learned how to created an injectable service using @Injectable() metadata.
- We did an abbreviated tour of the Angular 2 binding syntax.
- We learned how routes are added to our view with router-outlet and the syntax for navigating to a route using routerLink
Let me know what you else you would like to learn in the comments below and in the meantime… #highFive!


Hi,
I would like to ask you on ething. How would you propose to make an autocomplete like input with Angulr2 used to consume a restfull service from non-angular server?
Funny you should ask 😀 I just watched this the other day…
Angular 2 Data Flow – Jeff Cross, Rob Wormald and Alex Rickabaugh
The Presentation
The Slides
This should get you started.
Thanks for the example!
I suggest to put the the explicit ‘implements OnInit’ clause whenever you’re using ‘ngOnInit’ hook. This helps Typescript compiler to find possible errors like TS2420: Class ‘HomeComponent’ incorrectly implements interface ‘OnInit’.
Thank you so much for this – I’m really diggin NG2 but the syntax and Typescript take a bit to get used to before it feels familiar.
One question though: have you considered using bundlers like Webpack ? Or is this out of scope for this article?
I’m really diggin Webpack with Angular2
Thanks again for a great article
Hmmmm… where IDE are you using? I am using Atom with the atom-typescript package and am not throwing any warning as well as in the console when I compile.
Hi Lars —
Personally, I prefer Webpack, but there are a few more moving pieces which is why I went with systemjs for the initial article. Webpack is great but warrants an entire post just to cover the basics.
We have an excellent Angular 2 Webpack starter that I use for any “real” work that you can check out here https://github.com/AngularClass/angular2-webpack-starter #highFive
Hello, thanks for this tutorial. Isn´t it possible to give source codes to Pluncker? It will help others.
Hi Petr — I would need to convert a few things but let me see what I can do!
Fantastic intro, thanks!
Hi,
Great article. So much to learn compared to Angular version 1. One thing that may prevent other readers from successfully installing the project is a missing command in your GitHub repo. Your instructions:
git clone https://github.com/simpulton/angular2-website-routes.git
npm i
npm start
Here’s what I did to install your project:
First I went to the directory on my disk that I intended be the parent directory of your installed project. In my case I have a projects directory
cd projects
At that point I issued the clone command:
git clone https://github.com/simpulton/angular2-website-routes.git
Then I changed to the newly created sub-directory, called “angular2-website-routes”, that is created by the git clone command:
cd angular2-website-routes
This is a critical step because I wanted npm to install the project’s dependencies within this new directory.
For review, the “npm i” aka “npm install” command read’s the “package.json” file in the current directory and installs all the package’s dependencies into a “node_modules” sub-directory. If you don’t change directories to the project before issuing the “npm i” command then the npm command is is going to be looking for a “package.json” file in the parent directory of the project.
Then I issued the “npm i” command to download the modules listed as dependencies in the “package.json”.
npm i
Once all the listed dependencies are installed in the “node_modules” directory.
Now the “npm start” command reads the “scripts” section of the “package.json” file which, as the article says, compiles the “app/app.component.ts” TypeScript file into “app/app.component.js” JavaScript file, and then kicks off the lite-server in a new browser tab at localhost:3000.
This is where the project runs.
Thanks, Anthony! Updating the README now.
Hey Lukas,
I haven’t done your latest tut on using RX inside Angular2 so maybe these topics are already covered by it, but I think learning more about how to handle state, immutable objects, diving deep into how implement one-way data flow using best practices in NG2 that mimic the methods that has made react such a compelling option for many NG1 users would all be great topics in my opinion 🙂
Thanks for such awesome content!
Thanks, Spencer! I believe that uni-directional data flow with immutable objects (especially with observables) will be the new “normal” of how we write Angular applications (even NG1.x). Definitely, check out Build a Better Angular 2 Application with Redux and ngrx because I get into those topics in a big way. My goal is to start framing these concepts in a way that makes it easy for existing Angular 1.x developers to shift their worldview on how data flows through an app and what that means. With that said, let me know what you think about the redux post! #highFive
Hello, thanks for this tutorial. Great work.
Nice tutorial, here is the steps to setup angular 2 development workspace easily.
http://www.adeveloperdiary.com/angular-js/angular-2-x/setup-angular-2-typescript-development-workspace/
Great tutorial. What I’d really like to see (been having a hard time finding this content anywhere) is how to build and deploy for production, both with systemjs and webpack.
Great article to get started with Angular2 using an ‘end-to-end’ approach. Any thoughts of updating this to latest version of Angular2?
@Joel – the code is on the latest – just need to update the post. Thanks for pointing that out!
Hi I downloaded a latest version of node js and install it, I even tested it to see weather is installed by typing in the command line node -v and npm – v it gives me the version now I also downloaded the angular seed. zip and hold down shift key and right click which opens the command prompt I typed npm install, but to my surprise it didn’t install all the dependencies . it fails with so many errors and finally it says npm may not be able to find file
please help me what could be the problem
Kindly update your contents as angular is in RC4 phase. Your routing is outdated.
I ran an AngularJS 1 app both on a shared hosting service under Apache, and as just one of many apps on a Windows IIS server. Now, are we saying that I can no longer do that, because it only runs under a nodejs server, which I can neither use on my shared hosting service nor on our production Windows Server alongside non-Angular .NET apps?
@Nitin I accept pull requests 😀
@Bruce Not at all 😀 You can run and deploy Angular 2 applications just like Angular 1 applications. At the end of the day, it is just a bunch of assets that you need to put on your web server. I just use Node.js because it is easy and it is JavaScript.
Nice tutorial . What’s your opinion for angular cli buluilding a website ?
@Istoselides Thanks! Then Angular CLI is good getting better!
Really… thanks. This is a great starter!
Good article, would be great if updated for Anglar 2 final release.
I found 2 main issues with this tutorial, first for someone just getting into Angular 2 and coming from creating vs13 mvc websites I noticed a number of steps that are I’m guessing assumed and thus missed.
For example once you download the code the first thing you do is not to run npm i but instead to navigate to the folder directory using cmd or whichever similar software, then you’d run npm i.
The next more important one is all the errors that occur when trying to run npm start which I’m guessing is related to the age of when this tutorial was created/last updated as other have mentioned it needing to be updated.
Makes things clearer. Thanks
I am new to Angular 2, the first problem I am facing is where to write those classes, means what should be the file names and directory paths to write those classes that you are mentioning, it would be very helpful if you could show me why you are writing in those classes and where to write them.
I am struggling to start with it, I am just losing the track with semantics of these new Languages that are emerging. Can you please help me with that?
You can try localhost:4200 instead of localhost:3000.
Hi,
Thanks for the great article!
I have an issue though when running npm start I am getting these errors:
ERROR in [default] C:/APP/angular2-website-routes/app/about/about.component.ts:6:12
Cannot find name ‘require’.
ERROR in [default] C:/APP/angular2-website-routes/app/app.component.ts:11:12
Cannot find name ‘require’.
ERROR in [default] C:/APP/angular2-website-routes/app/app.component.ts:12:11
Cannot find name ‘require’.
ERROR in [default] C:/APP/angular2-website-routes/app/experiments/experiment-details/experiment.detail.component.ts:6:12
Cannot find name ‘require’.
ERROR in [default] C:/APP/angular2-website-routes/app/experiments/experiments.component.ts:10:12
Cannot find name ‘require’.
ERROR in [default] C:/APP/angular2-website-routes/app/home/home.component.ts:6:12
Cannot find name ‘require’.
ERROR in [default] C:/APP/angular2-website-routes/node_modules/@angular/common/src/directives/ng_class.d.ts:72:34
Cannot find name ‘Set’.
ERROR in [default] C:/APP/angular2-website-routes/node_modules/@angular/common/src/facade/async.d.ts:27:32
Cannot find name ‘Promise’.
…
etc
…
ERROR in [default] C:/APP/angular2-website-routes/node_modules/rxjs/Observable.d.ts:66:59
Cannot find name ‘Promise’.
ERROR in [default] C:/APP/angular2-website-routes/node_modules/rxjs/Observable.d.ts:66:69
Cannot find name ‘Promise’.
webpack: Failed to compile.
Thanks
Hi Jose!
I just ran through a couple scenarios on my machine, and I got almost the identical error that you have when I uninstalled the
typingsnode module. In order to run this project, you will need to install thetypingsmodule globally vianpm i -g typings, and then once you have navigated to the project in your terminal, runtypings install. That will download all the necessary typings to make typescript happy. Hope that helps!Hi Lukas,
That fixed the issue!
webpack: Compiled successfully.
Now I just need to study and try to relearn Angular cause I’ve worked only with 1.x versions so far…
Thanks for your help!
cheers